How to Install Foam Weatherstrip Around a Door
This short guide will show you the basics of how to install foam weatherstrip around a door from a very high level. Bear in mind that special finishes, unique dimensions and other factors can affect the protocol detailed herein and this is simply to serve as a basic guide.
What Is Foam Weatherstrip?
Foam weatherstrip is a special type of weatherstripping, typically made from closed-cell foam such as EPDM, PVC, or neoprene, although it is perhaps most commonly made from EVA, or ethyl vinyl acetate.
This material offers excellent insulative properties, helping to seal air inside of your house, and keeping the air outside from entering. As a result, foam weatherstripping can be instrumental in cutting energy costs both in the winter as well as in the summer, as well as keeping noises outside the home from intruding on the peace and sanctity of your interiors.
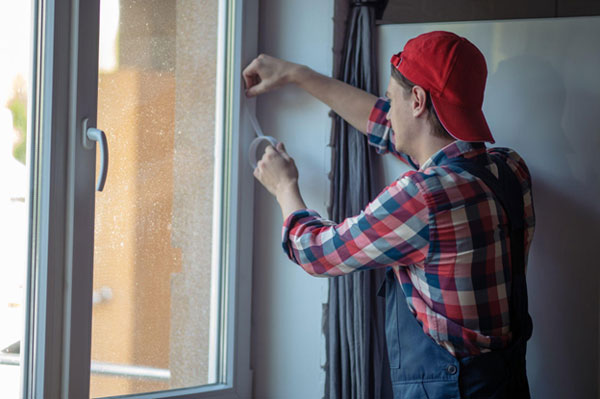
How to Install Foam Weatherstrip
Installing adhesive foam weatherstripping is remarkably easy, and as door and window weatherstripping is concerned, offers probably the most straightforward route since you don’t need to be weatherstrip adhesive, since the weatherstrip backing will already be equipped with an adhesive for that purpose.
Here’s your basic step by step guide.
- Determine how much door weather stripping you will need.
Depending on where you’ve determined air leaks into or out of your house, you may or may not need to weatherstrip the entire perimeter of the door. Most commonly, weather stripping is applied underneath the door as well as along the outer edge of the door where it closes against the far side of the jamb.
- Measure and cut the foam weatherstrip that you will need.
Once you have determined how much weather stripping you need, measure it and make your cuts, either with a pair of shears, a utility razor, or a sharp knife. A good rule of thumb is to leave a few extra inches on the end of the weatherstrip as you cannot add more and if you come up short, you will need to cut again. Also, a little extra foam weatherstripping is no problem as you can trim it easily even after it’s been installed, for a snug fit.
- Clean and prepare the surface.
Once you’ve measured how much foam weatherstrip you’ll need and made your cuts, it’s time to prepare the door jamb or frame. If applying it to the threshold at the base of the door, make sure to thoroughly clean the area before hand, then use a little rubbing alcohol to make sure that there is no grease, oil, or anything of that nature on the threshold as this will prevent the adhesive from sticking properly.
The same goes for the door jamb, although that, being lifted off of the ground, should be easier to clean. Wipe it down with a clean or damp rag, and if there are any areas in which there is any grease or grime, use a little bit of rubbing alcohol to remove it.
Make sure the surface on which you intend to apply the foam weatherstripping is completely dry before you proceed.
- Remove the adhesive backing from the foam weatherstripping.
Once you’ve measured and cut your foam weatherstripping and cleaned the surface on which you’ll be applying it, you can remove the adhesive backing. Be careful when doing this as you don’t want the exposed adhesive to contact anything prior to it being positioned over the area where it will be applied.
Alternatively, you can remove a small section of the adhesive backing, press down the foam weatherstrip over the area where it will be applied, and remove the backing as you press down the weatherstrip.
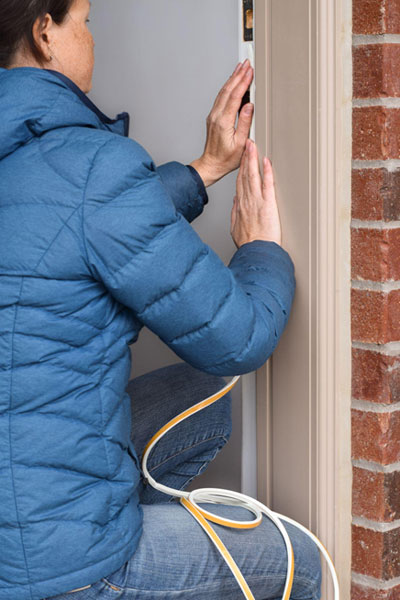
- Position the weather strip in place and press down.
Place one end of the exposed adhesive of the foam weatherstrip over the area where you will install it, then press down firmly, working along the length of the weatherstrip that you intend to install till you get to the end of the strip.
If there is any excess at the end of the strip you have applied, you can trim it off as no overhang is needed, and it may actually interfere with the operation of the door.
Also, once the door weather stripping has been applied, either use your hand or a roller to firmly press down on the strip to secure it in place and ensure that the adhesive is properly activated.
- Allow the weatherstripping to sit for at least a minute (if not longer) before using the door.
Before you open and close the door, make sure you let the foam weatherstripping sit for at least a minute to allow the adhesive to engage and cure. Prematurely working the door can rip the weatherstripping away from where it’s installed, permanently damaging the adhesive and requiring the weatherstripping to be entirely replaced.
Why You Should Install Weather Stripping in the First Place
Now that you have a short overview of how to install foam door weatherstripping, here are some of the best advantages you will reap in the wake of this simple but impactful DIY project:
- Installing an effective window or door weather stripping can make your home more comfortable and help cut your heating costs in the winter and your cooling costs in the summer.
- Window and door weatherstripping can keep noise outside, or inside, making your home cozier and more private.
- Properly-fitting weatherstripping can also provide a reasonable means of pest ingress prevention, similar to a screened window.
- When properly installed, weather stripping can help keep pollutants and allergens like pollen out of your home.
Explore Door and Window Weather Stripping Here
Interested in adding window or door weatherstripping around your home? Check out our collection; in addition to adhesive foam weatherstripping, we carry a wide variety of other options that are also relatively easy to install and which can effectively improve your home’s HVAC efficiency. Check out our collection and if you have any questions get in touch with us directly.
- 0 items